Every spring, roofers get the same phone call. A homeowner looks out the window after the first real windstorm of the year and sees shingles flipped up, folded back, or gone — on a roof that was installed just a few months earlier, in the dead of winter. The shingles aren’t torn. The nails are still in place. Nothing is “damaged” in the way an insurance adjuster means the word. The roof simply never bonded to itself, and the first 45-mph gust found that out before the homeowner did.
This failure is almost entirely preventable, and it comes down to a feature of your roof that you have probably never heard a salesperson mention: the self-seal strip. It’s a thin band of heat-activated adhesive that turns a stack of individually nailed shingles into a single, wind-resistant membrane. Whether that strip actually does its job depends on temperature, sunlight, cleanliness, and time — which means it depends, more than almost anything else, on when your roof gets installed and whether your contractor respected the chemistry.
This article is the whole story: what the seal strip is, the physics of how it bonds, what the major manufacturers actually require (not what the blogs claim they require), why cold-weather installs are a gamble, why hot-weather installs have their own failure mode, how a never-sealed roof can fall into a no-man’s-land between your warranty and your insurance, and exactly what to ask before you let anyone put shingles on your house.
What the self-seal strip actually is
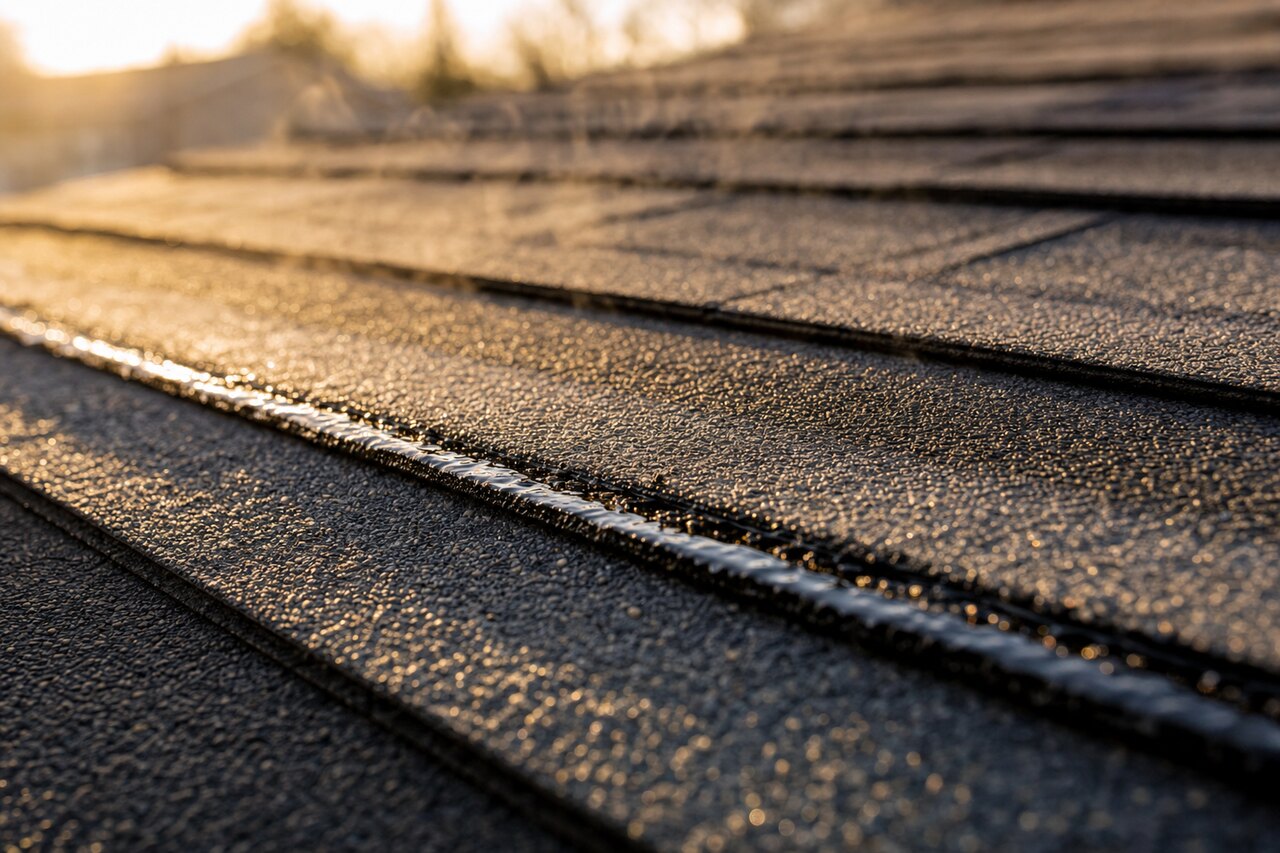
Pick up a single architectural shingle and look at the face. Running horizontally across it is a band — sometimes a continuous line, sometimes a series of dashes or dots — of darker, slightly tacky asphalt-based adhesive. On most products it’s covered from the factory by a thin release film or a strip of sand so the shingles don’t glue themselves together in the bundle. That band is the self-seal strip, and it’s the single most important reason modern asphalt roofs can survive wind at all.
Here’s the mechanism. When shingles are installed in courses, each course overlaps the one below it. The seal strip on the lower shingle sits directly beneath the bottom edge (the “tab”) of the shingle in the course above it. When the adhesive warms up, it softens, flows slightly, and bonds the underside of the upper tab to the top of the lower shingle. Do that across every course and every shingle, and the entire field of the roof becomes laminated together. Wind can no longer get under an individual tab and peel it back, because that tab is glued to the shingle beneath it along its entire width.
Before self-sealing strips became standard, roofers had to hand-cement every tab with dabs of asphalt plastic cement, or they used interlocking shingles that mechanically hooked together. The factory-applied thermoplastic strip replaced all of that. It was one of the quiet revolutions in residential roofing — and because it’s automatic, it’s also the step that’s easiest to take for granted and easiest to get wrong.
The physics: heat, sunlight, pressure, and time
The seal strip is a thermoplastic — a material that softens when heated and hardens when cooled. For it to bond, four things have to happen, and all four matter:
-
Heat. The adhesive has to reach a temperature where it softens and becomes tacky. That heat comes overwhelmingly from the sun striking the roof surface — not from the air temperature a weather app shows you. A dark shingle in direct sun can sit 40–60°F hotter than the surrounding air. This is why a roof can seal fine on a clear, calm 45°F afternoon in the sun, and fail to seal at all on a cloudy 55°F day in the shade of a tall oak.
-
Clean, dry surfaces. The bond is a surface adhesion. Dust, dirt, pollen, frost, dew, or the release film left in the wrong place will all prevent the adhesive from contacting the shingle above it. A single morning’s frost or a film of construction dust can be enough to stop a seal from ever forming.
-
Pressure. The weight of the upper shingle, plus foot traffic during installation, presses the tab down into the warm adhesive. Shingles on a steep slope put less of their own weight onto the strip, which is one reason steep roofs are more prone to seal problems.
-
Time. Even under good conditions, sealing isn’t instant. In warm, sunny weather a roof may bond within hours to a few days. In cool weather it can take weeks. In genuinely cold weather it may not seal at all until the following spring — which is exactly the window during which winter winds will test it.
The critical insight that homeowners miss: a shingle that is nailed but not sealed looks completely finished. You cannot tell from the ground, or even from the roof, whether the strip has bonded. The roof is “done.” It sheds water. It passes a casual glance. It is simply not yet wind-resistant, and it won’t be until the sun does its work — if it ever gets the chance.
What the manufacturers actually say
There’s a lot of folklore about a single magic temperature — usually “40 degrees” — below which shingles “can’t” be installed. The reality in the manufacturers’ own technical bulletins is more nuanced, and the nuance is where homeowners get burned.
GAF, the largest U.S. shingle manufacturer, states in its technical guidance that there is no practical lower or upper temperature limit for installing fiberglass asphalt shingles, as long as appropriate precautions are taken. It recommends temperatures above 40°F simply for easier handling (cold shingles are stiff and crack), and it explicitly notes that hand-sealing may be required when it’s too cold for the factory adhesive to activate promptly. GAF also advises storing shingles in a heated space — around 70°F — for roughly a day before installation in cold weather, so they go onto the roof warm and pliable.
Owens Corning tells installers to take extra care handling and installing shingles when air and surface temperatures are at or below 40°F (about 4°C), and warns — importantly — that applying excessive asphalt roof cement when hand-sealing can cause shingles to blister.
CertainTeed-style cold-weather guidance commonly specifies that below roughly 40–50°F, shingles should be installed with six nails and hand-sealed, with an ideal application range in mild temperatures.
Notice what none of them say: none of them say “it’s fine to install in the cold and skip the sealing step.” Every major manufacturer’s position is the same underlying bargain: you can roof in the cold, but only if you compensate — warm storage, careful handling, six nails instead of four, and hand-sealing every tab with asphalt cement. The factory seal strip is doing a job; if the weather won’t let it do that job, a human has to do it by hand. The failure mode isn’t cold weather itself. It’s cold weather without the compensations — which is exactly the corner a rushed or low-bid crew will cut, because you’ll never see it and it’s slow, cold, miserable work.
Hand-sealing: the remedy, and why it gets skipped
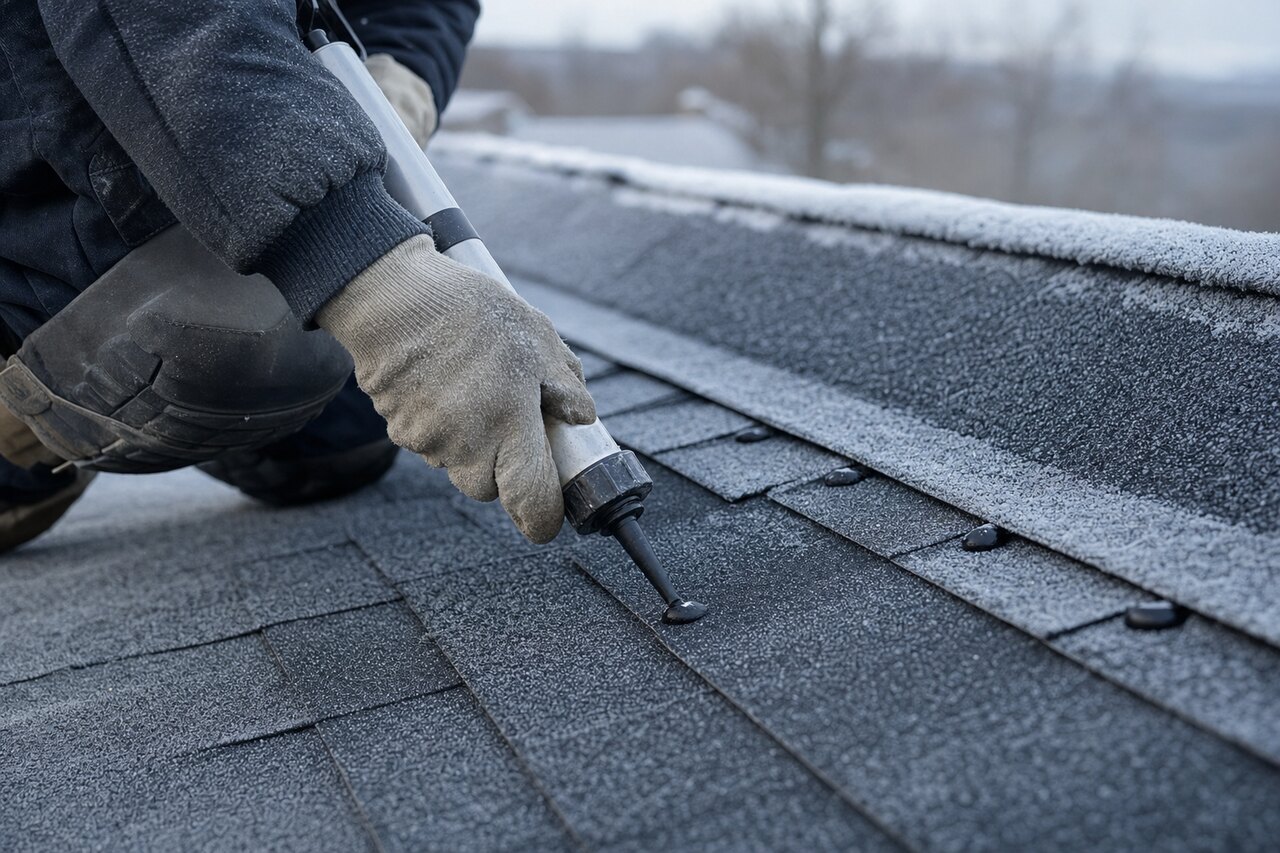
When the weather won’t activate the strip, the fix is hand-sealing: the installer lifts each tab and places a dab of asphalt plastic roofing cement underneath, then presses it down. The manufacturers are specific that this is dabs, not a bead — typically a spot roughly the size of a quarter (about an inch across) under each tab, in the locations the installation instructions specify. The adhesive doesn’t need the sun; it cures chemically.
Two things make this step both critical and commonly botched:
- Too little, and the roof isn’t bonded — you’re relying on the factory strip that the cold already defeated.
- Too much, and you create new problems. Over-applying roof cement traps solvents and causes blistering (raised bubbles in the shingle), and on light-colored shingles the excess cement can bleed and stain. More is not better. This is why a careful crew uses measured dabs, not a caulk gun run wild.
Hand-sealing an entire roof, one tab at a time, in the cold, adds real hours of slow labor. On a competitive bid in January, it’s the first thing to vanish from a crew’s actual practice — even when the contract and the manufacturer both require it. The homeowner has no way to verify it was done. Then the wind arrives.
Why cold installs fail in more ways than one
Unsealed tabs are the headline risk of a cold install, but the cold creates two more problems that compound it:
Brittle shingles crack. Asphalt stiffens as it cools. A cold shingle bent over a hip or ridge, or even flexed during normal handling, can crack or snap where a warm one would fold cleanly. Those hairline cracks become leak paths and weak points that fail early.
Fasteners go wrong. Nailing is less forgiving in the cold. A nail gun set for warm, soft shingles can overdrive — blowing the nail head straight through a brittle shingle so it no longer holds — or the stiff material can cause underdriven nails that sit proud and keep the course above from lying flat. Improper nailing is one of the documented systematic causes of seal-strip failure, because a shingle that isn’t held flat and tight can’t press into the adhesive below it. (This is also why cold-weather specs call for six nails instead of four: more fasteners, more holding power, less chance a gust finds a loose edge.)
So a bad winter install can stack three failures at once: a seal strip that never bonds, shingles cracked from cold handling, and fasteners that don’t hold. Any one of them undermines wind resistance. Together, they produce exactly the “the whole course just peeled off” call every spring.
Summer isn’t a free pass either
If cold is the obvious enemy, heat is the subtle one. In high summer, asphalt shingles get soft — sometimes soft enough that a worker’s weight leaves scuff marks, footprints, or granule displacement where boots drag across the surface. Those scuffs are cosmetic at first but represent lost granules, and granules are what protect the asphalt from UV. Staging material in stacks on a blazing roof can mar the shingles underneath. And while the seal strip bonds fast in the heat — often within hours — that same eagerness means a shingle set down slightly out of alignment can bond in the wrong position before anyone fixes it.
Good hot-weather crews work early, stage material carefully, and tread lightly. The seal will take care of itself; the risk is everything else the heat does to a soft shingle.
The ideal install window, unsurprisingly, is the mild shoulder season: dry spring and fall days, warm enough for reliable sun-driven sealing, cool enough that the shingles stay firm and workable. That’s not always possible — storms don’t schedule themselves around comfortable weather, and an actively leaking roof can’t wait for May. But for a planned, non-emergency replacement, timing is a lever most homeowners don’t realize they’re holding.
The part that costs you money: wind ratings, warranties, and the sealing fine print
Here’s where the chemistry meets your wallet.
Asphalt shingles carry wind ratings from standardized tests — ASTM D3161 (Class A up to 60 mph, Class D up to 90, Class F up to 110) and ASTM D7158 (Class D 90 mph, Class G 120, Class H 150). A shingle advertised as “130-mph rated” sounds like a guarantee. It isn’t. Every one of those tests assumes the shingle is fully sealed. The rating describes what a bonded shingle can withstand. On a roof where the seal strip never activated, the wind rating is a number that describes a condition your roof isn’t in. Independent testing by the insurance industry’s research arm has found that the strength of the seal between shingles is the single most important factor in how an asphalt roof performs in high wind — more than the shingle’s own rated class.
Now the warranty. Manufacturer wind warranties are conditioned on the shingles being installed strictly according to the published instructions — which include the hand-sealing and six-nail requirements for cold weather. They also require that the tabs actually sealed, and wind coverage is typically time-limited (often the first 5, 10, or 15 years) and capped at a stated wind speed. If a roof blows off because the installer skipped cold-weather hand-sealing, that’s an installation failure, and it’s precisely what the warranty’s conditions exclude. The manufacturer made a sound shingle; the crew didn’t install it per spec. Coverage denied.
And then the trap most homeowners never see coming — the insurance gray zone. When a roof with unsealed tabs lifts in the wind, forensic and insurance-industry guidance generally holds that a violated or never-sealed seal strip is not, by itself, wind damage unless the shingle is also creased, torn, or missing. The logic: wind didn’t break anything; it merely lifted tabs that were never bonded in the first place. So the homeowner can land in a no-man’s-land — the manufacturer points to an improper install and declines the warranty, and the insurer points to a pre-existing lack of seal and declines the claim as a workmanship/maintenance issue rather than storm damage. The roof failed, and no one’s policy pays. That outcome traces directly back to a cold Tuesday in January when a seal strip never got the heat it needed and nobody picked up a cement gun.
How to tell whether your roof actually sealed
You can check — and so can any competent roofer:
- The lift test. Reach under a shingle tab and gently pull up. A properly sealed tab resists, and if you pull hard enough it tears the shingle mat rather than releasing cleanly. An unsealed tab lifts freely with a clean separation along the adhesive line. Spot-check tabs across different slopes and exposures, especially north-facing and shaded areas that get the least sun.
- The “unzipping” pattern. When unsealed roofs fail, they tend to fail along a whole course at once — a continuous horizontal strip of tabs flipped up, because none of them were bonded. Damage from a true wind event is usually more scattered and is accompanied by creasing or tearing.
- Timing the check. If your roof was installed in cold or marginal weather, don’t assume. Have it inspected after the first stretch of warm, sunny days the following season to confirm the strips finally activated — and before the first big wind event, not after.
The homeowner’s playbook
You don’t need to become a materials scientist. You need to ask a few questions and make one scheduling decision:
-
For a planned replacement, favor the mild shoulder seasons. Dry spring and fall give you reliable sun-driven sealing and firm, workable shingles. Don’t rush a non-emergency roof onto your house in January just because a crew has an opening.
-
If it must be cold-weather work, make the compensations part of the contract — in writing. Warm storage before install, six nails per shingle, and hand-sealing of every tab with manufacturer-approved asphalt cement. If a contractor waves this off as unnecessary, that tells you they either don’t know the manufacturer’s requirements or don’t intend to follow them.
-
Read the wind clause in the warranty before you sign. Know the covered wind speed, the time limit on wind coverage, and the installation conditions that can void it. A “lifetime” shingle warranty and a 10-year wind warranty are two very different promises living in the same document.
-
Verify the seal after a marginal-weather install. The lift test is free. A roof that didn’t seal is fixable by hand-sealing before the wind finds it — and nearly impossible to collect on after.
-
Don’t let brand and color do all the talking. A premium, high-wind-rated shingle installed so that it never seals is worse than a modest shingle installed correctly in good weather. The sealing is the product; the brand on the bundle is just the starting material.
The bottom line
A modern asphalt roof is not a pile of nailed-down shingles. It’s a laminated system held together by a strip of adhesive the width of your finger, activated by heat the sun delivers after the crew drives away. When that strip bonds, you get the wind resistance you paid for. When it doesn’t — because the roof went on too cold, or too dirty, or too fast, without the hand-sealing the manufacturer requires — you get a roof that looks finished, sheds rain, passes inspection, and then peels apart in the first real wind, with neither your warranty nor your insurance obligated to help.
The good news is that this is one of the few roofing failures you can prevent with a calendar and a conversation. Pick the right season when you can. Demand the cold-weather compensations when you can’t. And remember that the most important part of your new roof is the part you’ll never see doing its job — a thin, warm, tacky line of asphalt, quietly gluing your roof to itself.
Temperature thresholds, nailing requirements, and warranty terms vary by manufacturer and specific product; always follow the published installation instructions for the shingle being installed and confirm wind-warranty conditions in writing. Figures reflect commonly published industry and manufacturer guidance as of 2026.