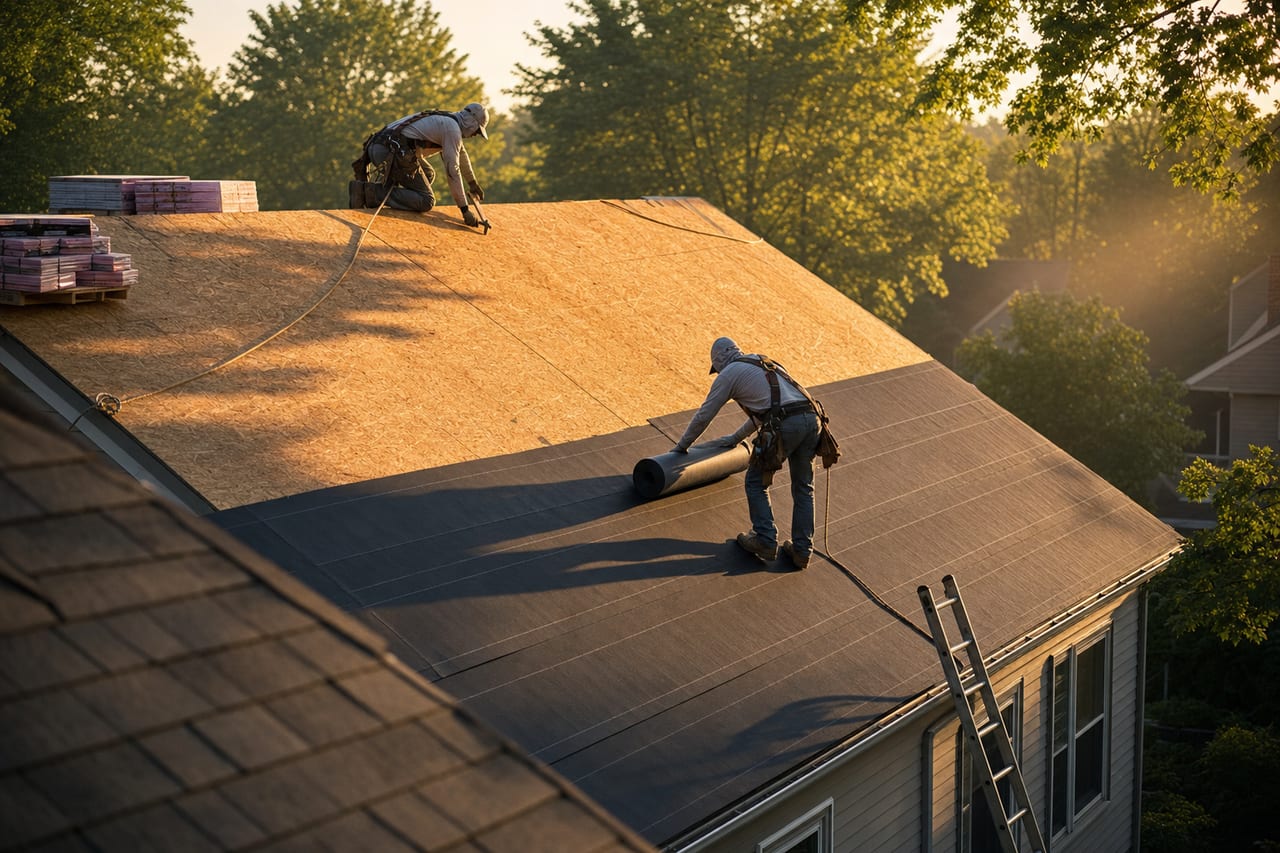
Most homeowners experience a roof replacement as noise, a dumpster, and then a bill. What happened up there in between is mostly a mystery — which is exactly the problem. The work that determines whether your roof lasts 12 years or 30 happens in a single day, mostly out of sight, and most of it is either done right the first time or never inspected again until it leaks. If you don’t know what the sequence is supposed to look like, you can’t tell a clean job from a rushed one while it’s still happening — which is the only time you can actually do anything about it.
This is the operational walkthrough: what happens before the crew arrives, what tear-off day actually looks like hour by hour, the deck inspection that quietly decides whether your “fixed price” quote grows a change order, how dry-in and shingle installation are sequenced, what a magnetic sweep is and why it matters more than it sounds like it should, and what a real final walkthrough covers versus a wave from the driveway.
Before the crew shows up: the week that determines how smooth the day goes
A well-run reroof is boring on install day because the hard decisions got made in the week before it.
Material delivery. Shingles, underlayment, flashing stock, and ventilation components typically arrive a day or two ahead, either staged in the driveway or hoisted directly onto the roof by a boom truck or conveyor lift. If a full pallet of shingles is stacked directly on the driveway apron for more than a day or two, ask whether it’s blocking anything — pallets are heavy enough to crack older asphalt.
Permit in hand. In nearly every jurisdiction, a residential reroof requires a building permit and at least one inspection (see Roofing Permits and Inspections). The permit should be pulled before tear-off starts, not applied for after the fact — a contractor who starts without one is gambling with your project, not theirs.
Property protection plan. A competent crew walks the property before tear-off and stages protection: tarps over landscaping beds directly under the eaves, plywood sheets leaned against exterior walls near where ladders will rest, and tarps over things like pool equipment and patio furniture stored against the house. An outdoor AC condenser needs different handling — draping a tarp directly over a running unit blocks the airflow it needs to reject heat and can trip it into shutdown or damage the compressor, so the right move is a ventilated cover, or having the crew shut the system off before covering it. Cars should be moved out of the driveway — both for access and because falling debris and roofing nails do not discriminate between grass and a windshield.
Dumpster or trailer placement. A tear-off produces a genuinely large volume of waste — a 30-square roof (3,000 sq ft) can generate 2–4 tons of old shingles, felt, and flashing. The dumpster or roll-off trailer needs a placement that’s close enough for an efficient toss but doesn’t block a neighbor’s driveway or sit on a septic field, tree roots, or a underground line the crew doesn’t know about. Worth asking about before delivery, not after the driveway is cracked.
Tear-off day, hour by hour
Setup (first 30–60 minutes)
The crew arrives, confirms the protection plan is in place, sets up ladders and roof jacks (temporary brackets that hold a plank for footing on steep pitches), and stages tools. On a typical single-family roof, crews of 4–8 are normal; a straightforward 20–25 square roof with easy access is routinely a one-day job with a full crew.
Tear-off (working ridge-down)
Tear-off starts at the ridge and works down-slope in sections, using flat shovels or specialized tear-off tools to strip shingles, underlayment, and old flashing down to bare deck. Crews typically work section by section rather than clearing the whole roof at once — this limits how much deck sits exposed to weather at any given moment and lets the deck-inspection and dry-in crews follow close behind rather than waiting for the entire roof to be stripped.
Everything comes off: shingles, the old underlayment (felt or synthetic), old drip edge, old step and valley flashing, old pipe boots. A tear-off that leaves any of the old system in place to save time is not a tear-off — see the code note below on why “recover” is a different (and more restricted) product.
One layer, or two, or a legal tear-off requirement? The IRC generally caps a roof at two layers of shingles before a full tear-off is mandatory — you cannot legally install a third layer on top. Many jurisdictions restrict it further, to a single layer, meaning any reroof is a tear-off by local rule regardless of what’s already up there. A recover (new shingles over one existing intact layer, no tear-off) is only permitted when the existing roof has just one layer, the deck underneath is sound, and the existing covering isn’t water-soaked, blistered, or buckled. Recovers are cheaper and faster, but they also mean nobody inspects your deck, your flashing gets buried rather than replaced, and problems under the old layer stay hidden for another 20–30 years. If a bid quotes a recover, ask directly whether your roof and your local code actually qualify for one — and whether you want one even if it does.
The deck inspection — the moment your quote can change
Once a section is stripped to bare deck, the crew (ideally the lead or foreman, not just whoever tore that section off) inspects it for rot, delamination, soft spots, and fastener pull-through — usually by walking it and by probing suspect areas with a screwdriver or awl. This is the single most consequential ten minutes of the entire project, because it’s where a fixed-price quote can turn into a change order.
Why this happens even with a good contractor. Deck condition genuinely cannot be assessed with certainty before the old roof comes off. A contractor can look for sagging rooflines, staining on the underside in the attic, or soft spots felt through the shingles during the initial estimate — and a good one will flag the likelihood of deck repair in the written quote, with a per-sheet unit price already agreed. But actual rot hiding under intact shingles, especially around chimneys, in valleys, and near wide chimneys without a cricket (see Roof Flashing), is often invisible until the deck is bare.
What should happen next, in order:
- The crew documents the damage — photos are standard practice, and you should ask for them regardless of whether they’re offered.
- You get a call or a text before any repair work proceeds, with the per-sheet price already established (this should already be in your signed contract as a unit price, e.g., “$X per 4×8 sheet of ½-inch OSB replaced, including labor” — not negotiated for the first time mid-job).
- Only sheathing that’s actually compromised gets replaced — not the whole deck, unless the whole deck is actually bad. A crew that proposes replacing the entire deck when a spot inspection found rot in one 4×8 area is worth a second opinion.
- Framing issues (a sagging rafter, water-damaged truss) are a different, larger conversation — they should stop work on that section until you’ve had a chance to decide how to proceed, not get quietly “handled.”
A contractor who has no mechanism at all for this — no photos, no documented per-unit pricing, just a verbal “yeah we found some rot, it’s extra” at the end of the day — is a contractor you should not have signed with, and one you should renegotiate hard with now.
Dry-in: the roof’s actual waterproofing layer goes on
Once a section’s deck is confirmed sound (repairs made where needed), the “dry-in” sequence begins — the point at which the roof becomes weather-resistant even before shingles go on:
- Drip edge at the eaves — installed first, directly on the bare deck.
- Ice-and-water shield at eaves, valleys, and around penetrations — a self-adhering rubberized membrane, required by most codes in the first few feet from the eave in cold climates, and standard best practice in valleys and around chimneys and pipes regardless of climate.
- Synthetic underlayment (or felt) across the remaining field — the secondary water barrier under the shingles across the whole roof.
- Drip edge at the rakes — installed over the underlayment (the eave/rake sequence is intentionally reversed; see Anatomy of a Roofing System for why).
- New flashing — step flashing at sidewalls, valley metal, chimney flashing components, and new pipe boots. Pipe boots and anything damaged or corroded should always be replaced — old nail holes and a perished rubber sleeve are liabilities, not savings. Exposed step and valley flashing is normally replaced too, since a full tear-off is the one time it’s accessible without extra demolition. The exception is flashing that’s concealed behind siding or embedded in masonry: if it’s still sound, code and manufacturer instructions may allow it to stay in place rather than force destructive cladding or masonry work just to swap it — ask your contractor which category applies to your specific flashing before assuming everything gets pulled.
On many jobs, the tear-off crew works one section ahead while a second crew dries in and shingles the section behind them — a staged, parallel workflow rather than a strict “tear off everything, then start over.” This is normal and efficient; it’s also why a roof can go from bare deck to fully shingled between morning and evening.
Shingle installation and the nailing detail that actually matters
Shingles go on starting at the eave with a starter strip (a specialized strip that seals the first course against wind uplift from below — a detail that’s invisible once the roof is done but is one of the most common places corners get cut).
The one installation variable with the most consequence for how your roof performs in wind is nail count and placement. There’s no single universal number — the required count and placement come from the specific shingle’s manufacturer-approved installation instructions and the local design-wind requirements for your area, which is why the same shingle can be a legitimate four-nail install in one region and a required six-nail install in a designated high-wind zone. Six nails is common where it’s required and is also what most manufacturers ask for to honor their highest wind-rating warranty tier, but a four-nail installation isn’t automatically a defect — it’s a defect only if it doesn’t match what the shingle’s instructions and your local code call for. Nails placed too high (above the manufacturer’s nail line) or driven at an angle (“nail creep”) reduce holding power even when the count is correct — that’s a workmanship defect regardless of region, invisible from the ground, and it shows up as shingles lifting or blowing off in the first real storm. It’s worth asking the crew directly which nailing schedule they’re following and why — a five-second answer that tells you a lot.
Ridge cap and ridge vent close out the system at the peak, and are typically the last material installed.
End of day: the part that’s easy to skip and shouldn’t be
The magnetic sweep. Roofing nails end up in the yard no matter how careful a crew is — a full box gets knocked over, a nail bounces off a chute. A magnetic roller sweep of the entire property (not just directly under the eaves) at the end of each work day, and again at final cleanup, is standard practice specifically because nails in grass are invisible and a lawnmower or a bare foot will find the ones a visual check misses. Crews typically work the yard in one direction, then cross-sweep at 90 degrees, since a single-direction pass misses nails lying parallel to the sweep line.
Weather contingency. If a job runs past one day, whatever section is torn off and dried in (underlayment installed) is protected against rain overnight; a section that’s torn off but not dried in should not be left open ahead of forecast rain. If weather is questionable, ask the crew lead directly what’s covered before they leave for the day — this is a completely reasonable question and a professional crew will have an answer ready without being asked.
Daily cleanup. Old shingles and debris go into the dumpster or trailer throughout the day, not just at the very end — a roof crew that lets debris pile up until 4pm and then rushes cleanup in failing light does lower-quality cleanup than one that’s been loading the dumpster all day.
The final walkthrough: what it should actually cover
A real final walkthrough is not a wave from the driveway and an invoice. It should include:
- A visual roof-surface check for uniform, straight shingle courses, correctly aligned ridge cap, no exposed fastener heads, and no visible sealant smeared where mechanical flashing should be doing the work instead (see Roof Flashing for what that looks like).
- Flashing verification at every penetration, sidewall, valley, and chimney — new, correctly lapped, and not relying on caulk as the primary seal.
- Gutter and downspout check — that they’re clear of debris knocked in during tear-off and that water demonstrably runs away from the foundation.
- A full property sweep — nails, torn tarps, footprints in beds, and any incidental damage (a cracked driveway paver, a bent downspout) documented and addressed, not left for you to discover in a week.
- Attic check, if accessible — a quick look for daylight through the deck, displaced insulation, or anything disturbed during the work.
- Documentation handover — the manufacturer warranty paperwork (often requiring registration within a specific window — see Roof Warranties Decoded), the workmanship warranty terms in writing, and before/during/after photos, especially of anything found under the old roof and repaired.
- A written punch list for anything not yet resolved, with a date for the fix — not a verbal “we’ll swing by.”
If your contractor’s idea of a final walkthrough is a phone call saying “all done, we’ll send the invoice,” ask for the checklist above explicitly. None of it is unreasonable to request, and a contractor with a real quality-control process will already have most of it ready without prompting.
What this means for you, practically
You cannot supervise a roofing crew the way a construction manager would, and you shouldn’t try — but you also don’t need to. What you need is to know the shape of a job that’s being done right, so you can ask the right two or three questions at the right moments: before the tear-off (permit and protection plan), when the deck inspection happens (documented, per-unit pricing, no surprise scope), and at the walkthrough (the checklist above, not a wave). A contractor who answers those questions clearly and without hesitation is one who runs this process every day and isn’t worried about you watching. That’s the contractor you want on your roof.
Process details reflect common residential roofing practice and IRC baseline requirements as of 2026; local code, contract terms, and manufacturer installation instructions govern the specifics of any individual job.